Trello Clone - phần 1 - Styled Components
Styled-Components là một thư viện giúp bạn tổ chức và quản lý styles trong các dự án sử dụng React tuân theo đề xuất từ Facebook.
Tất tần tật về React

Có nhiều cách thực hiện việc xây dựng layout cho các dự án sử dụng React.
- Cách truyền thống: chúng ta import các files CSS qua các thẻ
link. Hầu hết mọi người đều sử dụng cách này. Tuy nhiên, nếu bạn muốn đóng gói một số styles nào đó chỉ có thể được sử dụng riêng cho một số components thì hơi khó thực hiện nhé. - Style trực tiếp cho các components thông qua props
style. Cách này cực kỳ gây rối và dễ nhầm lẫn cho codebase cũng như khó tái sử dụng.
import { Column } from './Column'
import { Card } from './Card'
import { AppContainerView } from '../styled/AppContainerView'
import React from 'react'

export const Example = () => {
  return (
    <AppContainerView className="app-container">
      <div style={{
        display: 'flex',
        flexFlow: 'column nowrap',
      }}>
        <Column text="To Do">
          <Card text="Write Post Everyday" />
          <Card text="Wake up at 6 AM" />
          <Card text="Go to work" />
        </Column>
      </div>
    </AppContainerView>
  )
}
- Sử dụng các thư viện styling bên ngoài.
Để hạn chế các tác động không mong muốn lẫn nhau giữa các components và libraries, Facebook đề xuất styles của các components nên được đóng gói tách biệt và chỉ có tác dụng trong phạm vi component đó.
Styled Components
Styled-Components là một thư viện giúp bạn tổ chức và quản lý styles trong các dự án sử dụng React tuân theo đề xuất từ Facebook. Mục tiêu chủ yếu của nó là giữ styles của các components trong React gắn liền với chính các components đó. Styled-Components cung cấp một interface rõ ràng và dễ sử dụng cho cả React và React Native. Nó không chỉ thay đổi quá trình phát triển các components trong React mà còn thay đổi cả lối tư duy trong việc xây dựng styles cho các components đó.
Trello là một ứng dụng giúp chúng ta dễ dàng ghi chú cũng như lên kế hoạch thực hiện các công việc hằng ngày. Chắc hẳn các bạn ai cũng đều biết nó rồi đúng không? ^_^
Chúng ta hãy cùng nhau thử clone ứng dụng Trello này với React - TypeScript và Styled-Components nhé.
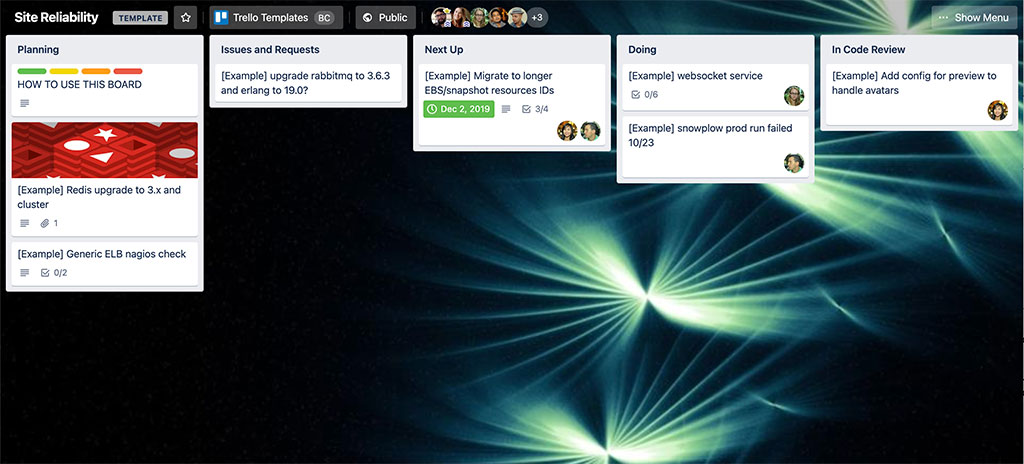
Hình demo thôi, không được như vậy đâu =)))
Khởi tạo ứng dụng
Để đơn giản, chúng ta hãy bắt đầu bằng create-react-app nhé.
# Sử dụng npx
npx create-react-app trello-clone --template typescript

# Hoặc máy bạn đã cài đặt yarn
yarn create react-app trello-clone --template typescript

cd trello-clone
Các đoạn hướng dẫn từ lúc này trở đi mình sẽ chỉ dùng yarn thôi nhé.
Cài đặt styled-components
yarn add styled-componentsChúng ta cũng cần cài đặt thêm bộ khai báo kiểu cho styled-components, nếu không, TypeScript sẽ báo lỗi.
yarn add @types/styled-components
Style cho AppContainer
Chúng ta cần một layout chứa danh sách các cột được sắp xếp theo chiều ngang. Ở đây mình sử dụng flexbox.
# src/styled/AppContainerView.tsx

import styled from 'styled-components'

export const AppContainerView = styled.div`
  align-items: flex-start;
  background-color: #3179ba;
  display: flex;
  flex-direction: row;
  height: 100vh;
  padding: 20px;
  width: 100%;
  overflow: auto;
`
Thử gọi nó trong App xem sao.
# src/App.tsx

import React from 'react'
import './App.css'
import { AppContainerView } from './styled/AppContainerView'

const App = () => {
  return (
    <AppContainerView>
      Columns will go here
    </AppContainerView>
  )
}

export default App
Chạy thử cái
yarn start
Xấu vl :)))

Chúng ta tiếp tục tạo thêm một số styled views như sau:
# src/styled/CardContainerView.tsx

import styled from 'styled-components'

export const CardContainerView = styled.div`
  background-color: #fff;
  cursor: pointer;
  margin-bottom: 0.5rem;
  padding: 0.5rem 1rem;
  max-width: 300px;
  border-radius: 3px;
  box-shadow: #091e4240 0 1px 0 0;
`
# src/styled/ColumnContainerView.tsx

import styled from 'styled-components'

export const ColumnContainerView = styled.div`
  background-color: #ebecf0;
  width: 300px;
  min-height: 40px;
  margin-right: 20px;
  border-radius: 3px;
  padding: 8px 8px;
  flex-grow: 0;
`
# src/styled/ColumnTitleView.tsx

import styled from 'styled-components'

export const ColumnTitleView = styled.div`
  padding: 6px 16px 12px;
  font-weight: bold;
`
Tạo Column và Card
# src/components/Column.tsx

import { ColumnContainerView } from '../styled/ColumnContainerView'
import { ColumnTitleView } from '../styled/ColumnTitleView'
import React from 'react'

interface ColumnProps {
  text?: string
}

export const Column = ({
  text,
  children,
}: React.PropsWithChildren<ColumnProps>) => {
  return (
    <ColumnContainerView>
      <ColumnTitleView>{text}</ColumnTitleView>
      {children}
    </ColumnContainerView>
  )
}
Để render các children components bên trong Column, chúng ta cần xác định kiểu cho props truyền vào Column là React.PropsWithChildren.
# src/components/Card.tsx

import { CardContainerView } from '../styled/CardContainerView'

interface CardProps {
  text: string
}

export const Card = ({ text }: CardProps) => {
  return <CardContainerView>{text}</CardContainerView>
}
Giờ cập nhật lại file App.tsx rồi chạy thử nhé:
# src/App.tsx

import React from 'react'
import './App.css'
import { AppContainerView } from './styled/AppContainerView'
import { Column } from './components/Column'
import { Card } from './components/Card'

const App = () => {
  return (
    <AppContainerView>
      <Column text="To Do">
        <Card text="Write Post Everyday" />
        <Card text="Wake up at 6 AM" />
        <Card text="Go to work" />
      </Column>
      <Column text="In Progress">
        <Card text="Learn React" />
        <Card text="Learn Typescript" />
      </Column>
      <Column text="Done">
        <Card text="Have breakfast" />
      </Column>
    </AppContainerView>
  )
}

export default App
Và đây là kết quả:

Đỡ hơn rồi ha. Ờ mây zing gút chóp em :)))

Tạm kết thúc ở đây nhé các bạn.
Bài viết tới mình sẽ hướng dẫn các bạn các interactions với ứng dụng như: thêm - sửa - xóa Column cũng như Card.
Cám ơn các bạn đã theo dõi và ủng hộ.


